If you are looking for a minimalist hardware wallet that keeps costs low while still offering strong security, the Digital BitBox is worth exploring.
In this guide, we will unbox the device, configure it on a Mac, update the firmware, create a wallet, and send a test Bitcoin transaction.
We will also compare it briefly to other popular hardware wallets to help you decide which one fits your needs.
What Is the Digital BitBox?
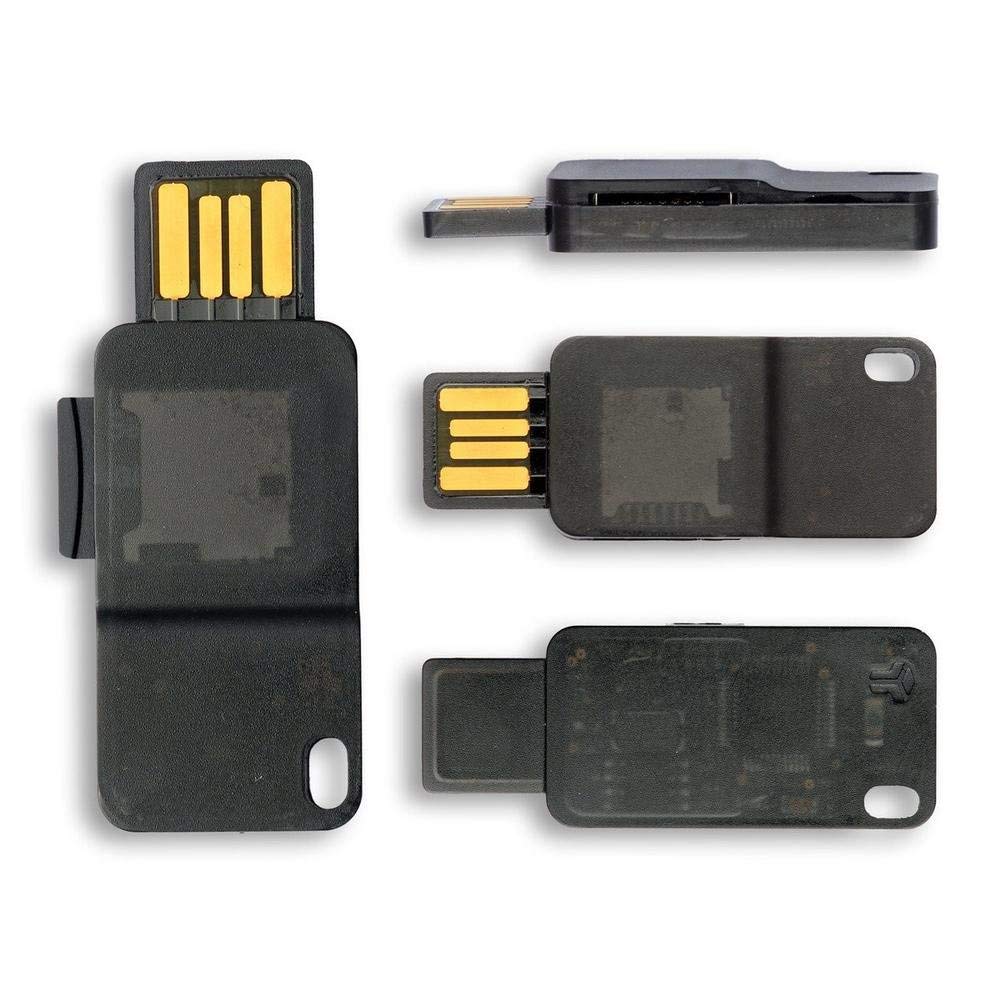
The Digital BitBox is a compact USB hardware wallet designed to securely store private keys offline.
Unlike software wallets, it keeps your keys isolated from your computer, reducing exposure to malware and phishing attacks.
Key features include:
- Compact USB design
- Micro SD card backup support
- Touch button confirmation system
- Firmware upgrade capability
- Optional mobile two factor authentication
Compared to larger wallets, it has no built in screen.
This design choice helps keep the price lower while maintaining essential security features.
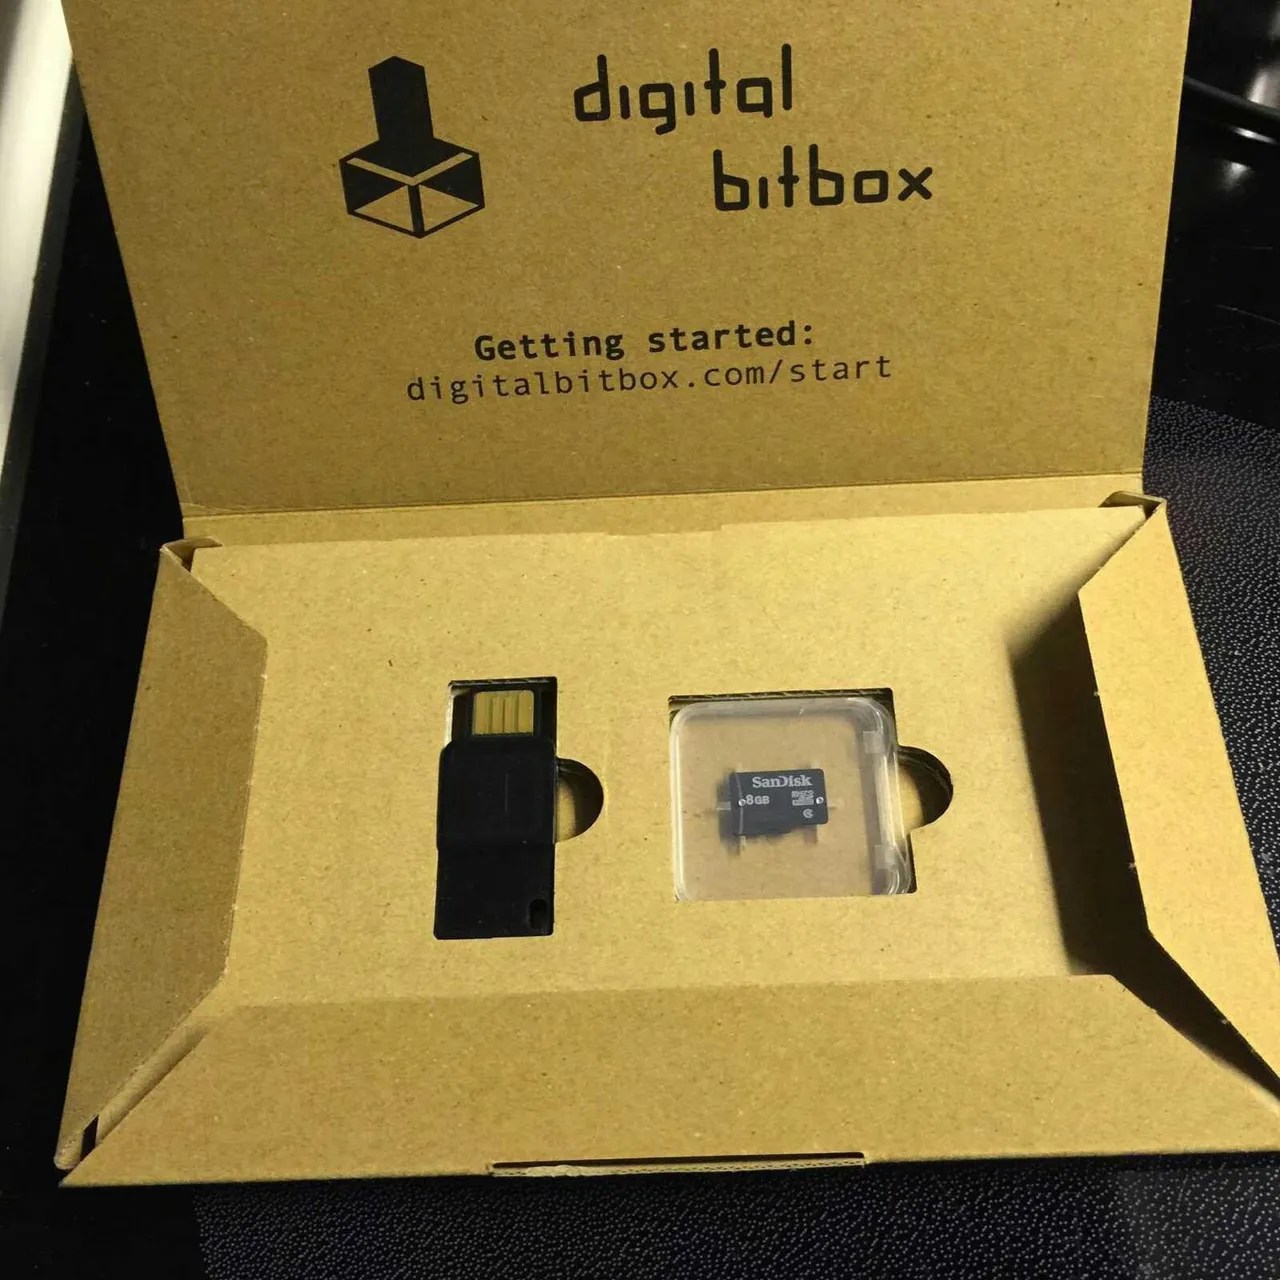
Unboxing the Digital BitBox
The packaging is extremely minimalist. Inside the box, you will find:
- The Digital BitBox device
- An 8GB micro SD card
- Basic instructions
There are no extra cables included. The wallet plugs directly into your computer’s USB port. This streamlined approach keeps manufacturing costs down and makes it one of the most affordable hardware wallets in its category.
The micro SD card plays an important role. It is used for wallet backup. Once your wallet is created, you should store the SD card somewhere safe and separate from the device.
Setting Up Digital BitBox on Mac
Step 1: Download the App
Visit the official start page and download the latest macOS version of the Digital BitBox app. Install and launch the application.
When opening for the first time, you may need to confirm that you trust the application in macOS security settings.
Step 2: Connect the Device
Plug the Digital BitBox into your Mac’s USB port. If the device is not recognized, try:
- Flipping the USB orientation
- Using a different USB port
Once connected properly, the app will detect the device.
Step 3: Create a New Wallet
You will be prompted to:
- Enter a wallet name
- Set a secure password
- Update firmware if required
Firmware updates are approved using the device’s touch button:
- Short touch disapproves
- Long touch of three seconds approves
After firmware installation, unplug and reconnect the device when prompted.
Understanding the Touch Button Security
The Digital BitBox uses a touch sensitive button on the device itself for confirmations. This is critical because:
- Private keys never leave the device
- Approvals must be physically confirmed
- Malware cannot approve transactions without physical interaction
There is also an optional mobile app that can enable two factor authentication. The device flashes to verify security using your smartphone.
Backing Up Your Wallet
After wallet creation, the system will prompt you to keep the SD card somewhere safe.
Important best practices:
- Store the SD card in a secure location
- Do not keep it in the same place as the device
- Consider a fireproof safe
The SD card acts as a recovery backup if your device is lost or damaged.
Receiving Bitcoin on Digital BitBox
To test the wallet, we generate a receiving address inside the app.
Steps:
- Click Receive
- Copy the Bitcoin address
- Log into your exchange account
- Paste the address carefully
- Send a small test amount
In this case, a small Bitcoin transaction was sent from an exchange account to verify functionality.
After a short wait and several refresh attempts, the transaction appeared in the Digital BitBox transaction history. This confirms that the wallet is working correctly.
Always send a small test transaction first before transferring large amounts.
Comparing Digital BitBox to Other Hardware Wallets
The Digital BitBox is noticeably smaller than competitors like:
- Trezor
- Ledger
Digital BitBox Pros
- Extremely compact
- Affordable
- Simple interface
- SD card backup
Digital BitBox Cons
- No built in screen
- Fewer on device verification features
- Less intuitive for beginners compared to screen based wallets
Many users prefer Trezor for its balance of usability and security. Ledger devices are also popular but can feel more complex during initial setup.
Mining Side Note and ROI Considerations
While waiting for a Bitcoin transaction confirmation, it is worth discussing mining profitability.
For example, a GPU mining Ethereum at approximately 37 MH per second can generate small hourly returns. However:
- Electricity cost matters
- Hardware price affects break even time
- Pool fees reduce net profit
Using mining calculators can help determine:
- Estimated hourly income
- Daily and annual revenue
- Power cost impact
- Break even timeframe
For small setups, profit margins can be thin. Scaling hardware and lowering electricity costs significantly improve profitability.
Is Digital BitBox Worth It?
The Digital BitBox is ideal if you want:
- A low cost hardware wallet
- A minimal design
- Simple Bitcoin storage
- SD card based backup
It may not be the best choice if you prefer:
- Large screens
- Advanced on device transaction details
- Maximum user interface convenience
For many users, the best hardware wallet balances:
- Security
- Ease of use
- Firmware reliability
- Long term company reputation
Final Thoughts
The Digital BitBox proves that hardware wallets do not need to be bulky or expensive to provide strong security. Its compact size, SD card backup system, and touch confirmation feature make it a solid entry level cold storage solution.
If you are serious about protecting your cryptocurrency, moving funds off exchanges and into a hardware wallet is one of the smartest steps you can take.
If you would like reviews of additional hardware wallets, consider researching and comparing multiple devices before making your final decision. Security is not about convenience. It is about control.
Leave A Comment