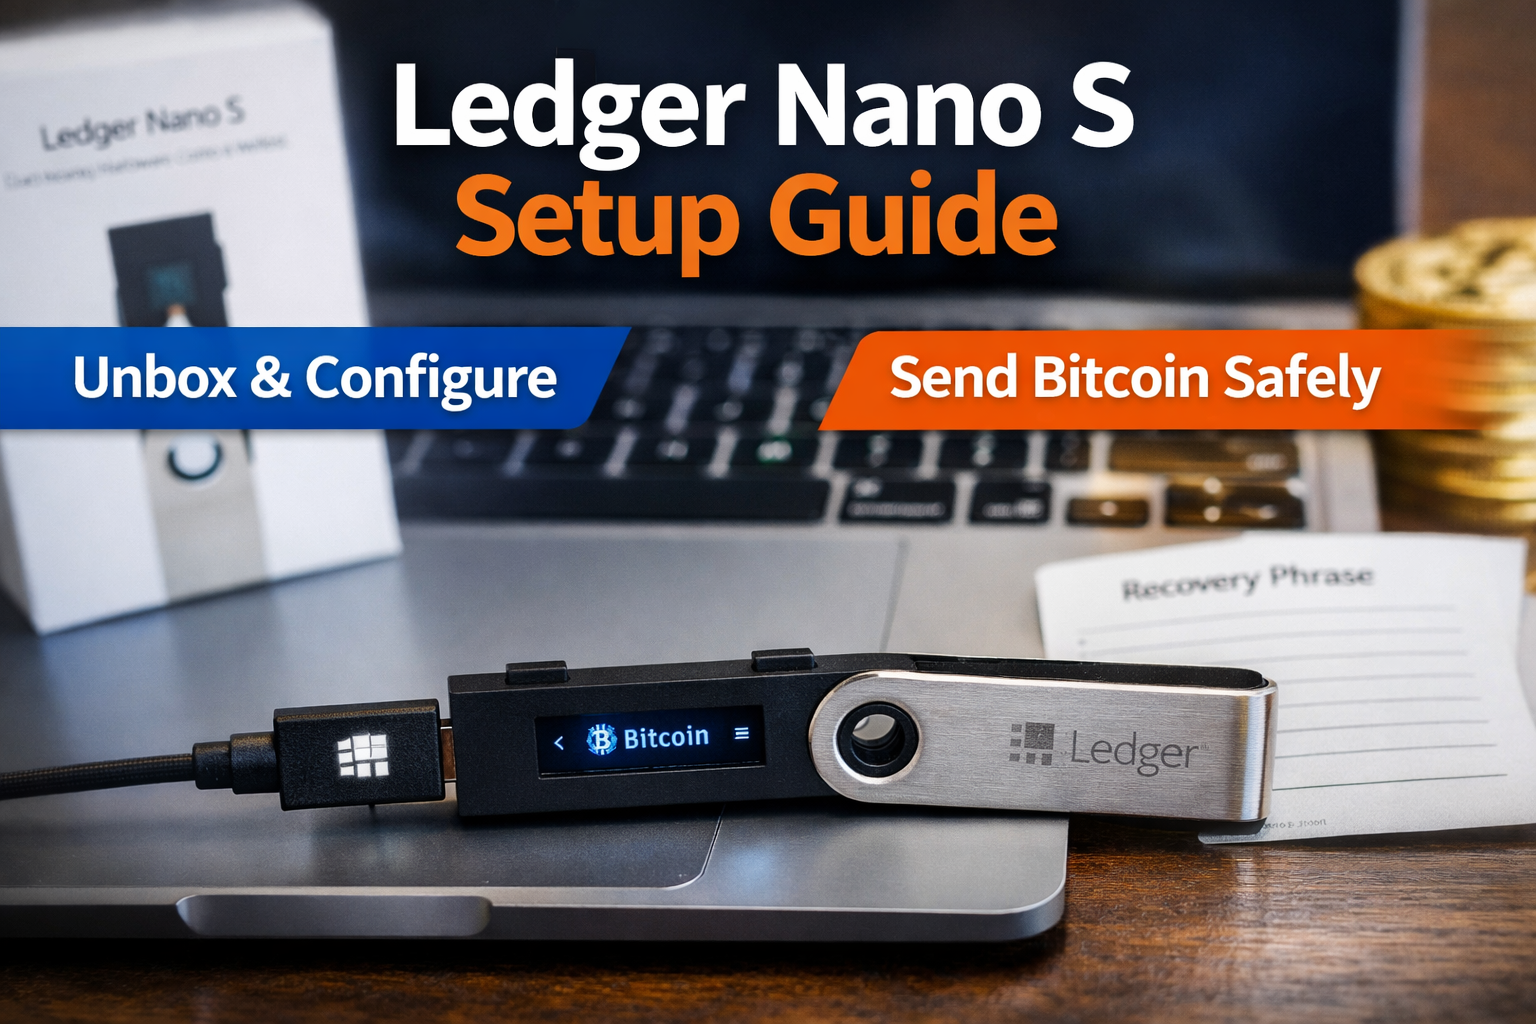
If you are serious about protecting your cryptocurrency, a hardware wallet is one of the safest ways to store your digital assets.
In this guide, we will walk through the full unboxing, setup and real world use of the Ledger Nano S on a Mac, including installing firmware, setting up a PIN, securing your 24 word recovery phrase and sending Bitcoin from Coinbase.
This step by step tutorial is perfect for beginners who want to securely store Bitcoin and other cryptocurrencies using a hardware wallet.
What Is the Ledger Nano S?
The Ledger Nano S is a hardware cryptocurrency wallet that stores your private keys offline.
Unlike software wallets, it keeps your keys isolated from your computer and the internet, dramatically reducing the risk of hacking.
Each time the device powers on, a cryptographic mechanism verifies the integrity of its internal software.
According to Ledger, the secure element chip protects against physical tampering and internal interception attempts.
Interestingly, the box does not include a traditional anti tampering sticker. Instead, Ledger relies on internal cryptographic verification at startup.
Step 1: Unboxing the Ledger Nano S
Inside the box you will find:
- The Ledger Nano S device
- USB cable
- Recovery phrase cards for writing down your 24 words
- Basic setup instructions
Compared to some other hardware wallets, the packaging is relatively simple. However, what matters most is the device verification process that runs every time it powers on.
Step 2: Connecting Ledger Nano S to a Mac
Plug the Ledger Nano S into your Mac using the included USB cable.
When powered on, the screen displays:
“Welcome. Press both buttons to begin.”
The device uses two side buttons:
- Left button scrolls left
- Right button scrolls right
- Pressing both buttons confirms a selection
This minimal interface keeps the device simple and secure.
Step 3: Choose and Confirm Your PIN Code
You will be prompted to:
- Choose a PIN code
- Confirm your PIN code
This PIN protects access to your wallet if someone physically obtains your device.
Important security tip:
Never share your PIN with anyone. If someone has your device and your PIN, they can access your funds.
Step 4: Write Down Your 24 Word Recovery Phrase
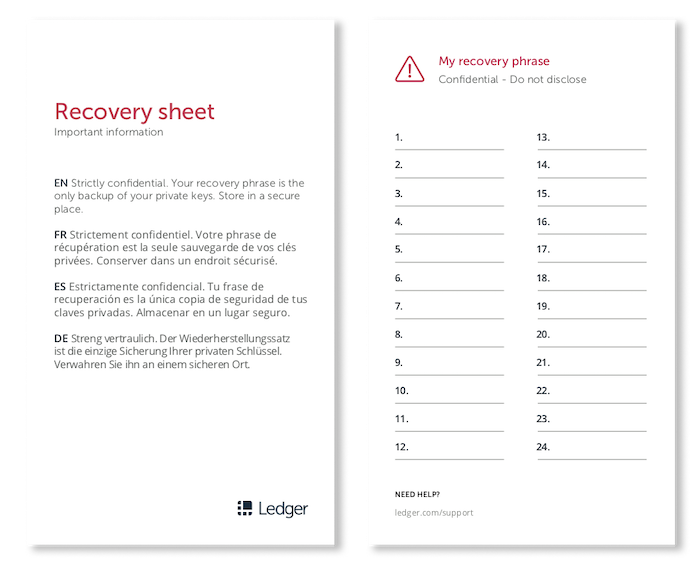
Next, the device generates a 24 word recovery phrase.
This is the most important part of the entire setup.
You must:
- Carefully write down all 24 words in order
- Store them in a safe location
- Never take a photo of them
- Never store them digitally
After writing them down, the Ledger will test you by asking you to confirm specific words by number.
This ensures you copied them correctly.
Critical rule:
Never store your recovery phrase in the same place as your hardware wallet.
Step 5: Install Ledger Software and Update Firmware
After initial setup, visit the official Ledger setup page and install the Ledger software.
When connecting for the first time, you may see:
- Firmware update required
- App installation prompt
It is highly recommended to install the latest firmware before proceeding. This ensures your device has the most up to date security patches.
Once updated:
- Unlock the device with your PIN
- Open the Ledger Manager
- Install the Bitcoin app
After installation, you will see “Bitcoin” displayed on the device screen.
Step 6: Receiving Bitcoin on Ledger Nano S
To test the wallet, we will send Bitcoin from Coinbase.
Generate a Receiving Address
Inside the Bitcoin app:
- Select “Receive”
- Display address on device
- Confirm the address matches on screen
Always verify the address directly on the device screen. This protects you from malware that could alter addresses on your computer.
Copy the Bitcoin address.
Step 7: Send Bitcoin from Coinbase to Ledger
Log into Coinbase and send a small test amount.
For example:
- Amount sent: $1 in Bitcoin
- Network fee: $0.18
Bitcoin network fees vary depending on congestion.
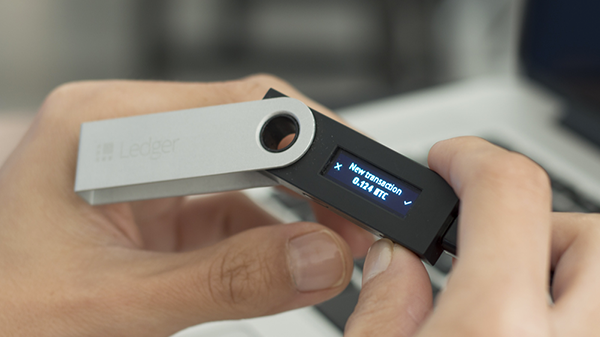
After sending:
- Wait for blockchain confirmation
- Check Ledger wallet for incoming transaction
Once confirmed, the Bitcoin will appear in your Ledger wallet.
This proves that:
- Your hardware wallet is configured correctly
- You successfully control the private keys
- Your Bitcoin is stored offline
Is Ledger Nano S Easy to Use?
The Ledger Nano S works securely and does what it promises. However, some users may find:
- The screen small
- The interface less intuitive
- The software slightly clunky
That said, the core function works: secure offline storage of cryptocurrency.
Best Security Practices After Setup
After finishing:
- Always unplug the device
- Store it in a secure location
- Keep the 24 word recovery phrase separate
- Never enter your recovery phrase online
If your device is lost or damaged, the 24 word phrase is what allows you to recover your funds.
Final Thoughts on Ledger Nano S Setup
Setting up the Ledger Nano S on a Mac is straightforward:
- Unbox and connect
- Choose PIN
- Secure 24 word recovery phrase
- Install firmware
- Install Bitcoin app
- Send test transaction
While the user interface may not be perfect, the security model is strong and the device fulfills its primary purpose.
If you want cold storage for Bitcoin and other cryptocurrencies, the Ledger Nano S remains a reliable hardware wallet option.


Leave A Comment